
Let’s face it, we want to buy amazing little models for our tabletop adventure, and we want to buy all the paint, or better yet, buy them pre-painted by someone with a steady hand and an understanding of shading.
But 1) who has the time unless it’s, like, part of your job? 2) HOW DO ART?
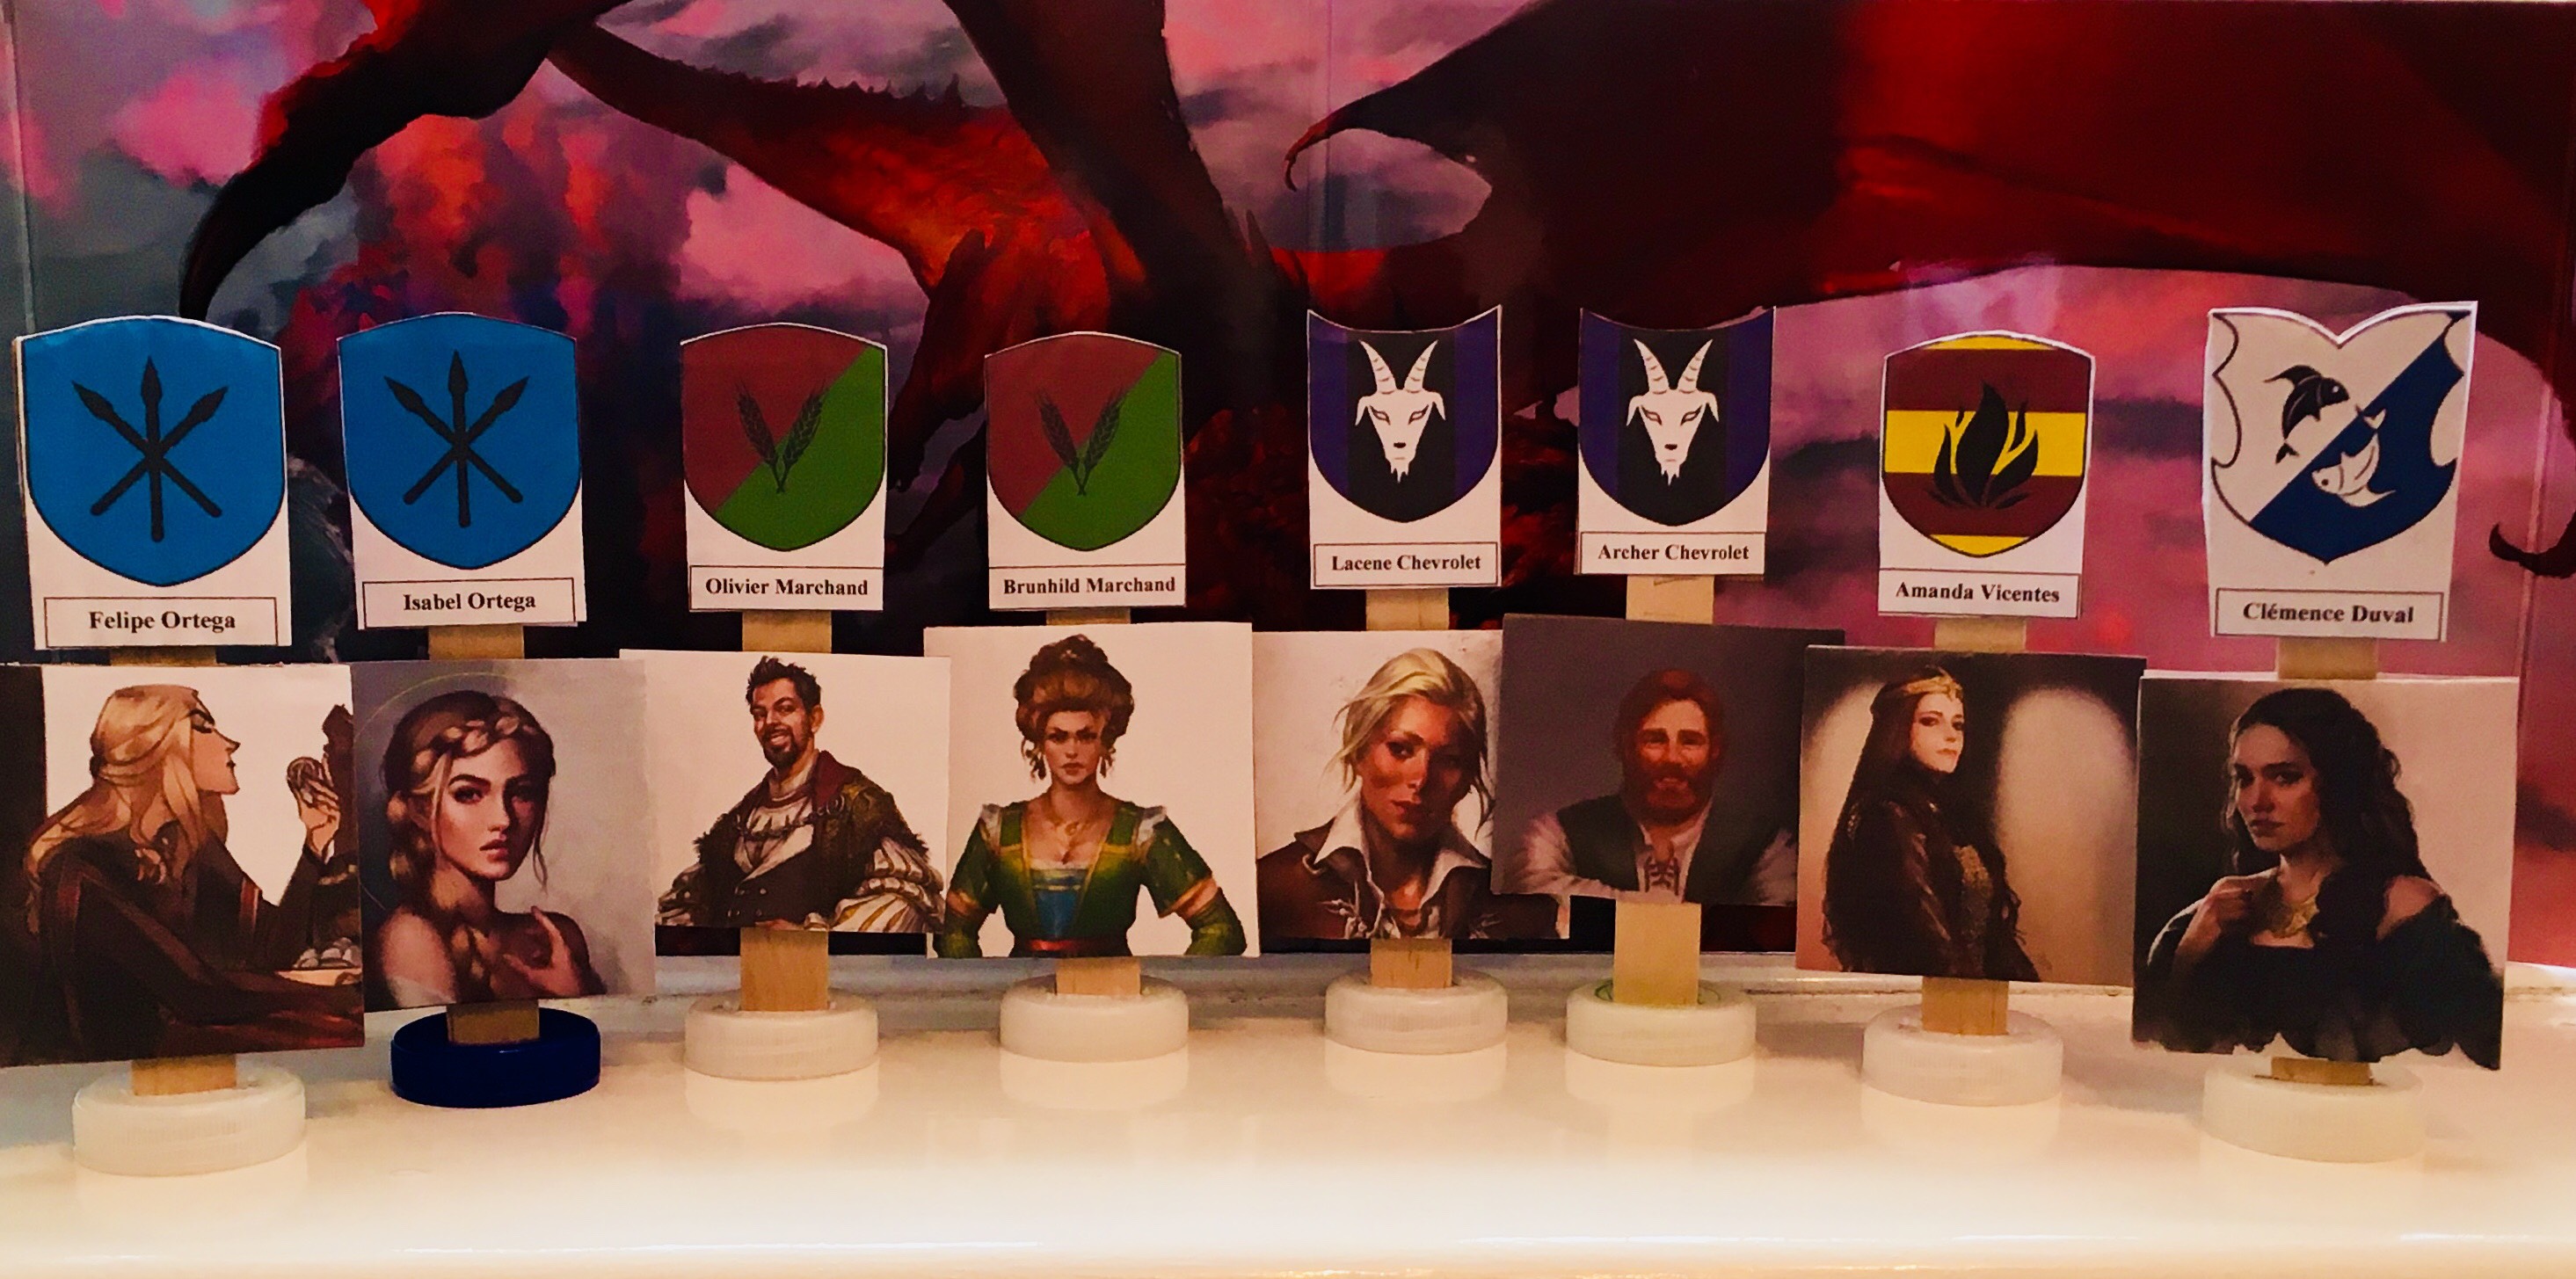
I found a way to create basic miniatures that require no skill in drawing, painting, or folding fiddly bits of paper. These took me about 8 minutes to make and they work perfectly for people starting out or who are super low on cash.

Time to Get Your Cheap Ass into Arts and Crafts
You will need:
- Glue stick
- Plastic bottle caps (about 1 inch wide)
- Lollipop sticks
- Thin cardboard
- A printer
Step 1:
If you haven’t already, find pictures that represent the monsters or people you want to create. This is the longest process, but it can be quite fun. Since you’re (presumably) playing a private, non-commercialised campaign and not selling these minis, you can use whatever artwork you like! Start googling, take images from Magic the Gathering, Offical D&D, or maybe there are artists who inspired your characters/monsters to begin with. Save them to a file on your computer.
Step 2:
Create a Word document (unless you have something better, Fancy Pants) and slap in those pictures. Right-click the image -> select format options -> select ‘tight’. This should allow you to arrange pictures anywhere on the page. Scale them down to match the height of the lollipop, and not much wider than 1 inch square. If the image is too big, I have a feeling it will topple over! No need to be exact, though.
I’d recommend leaving a bit of white space between the pictures. Once you’ve got all of your images scaled down and arranged, print them off—each sheet printed twice (optional, more info in step 4).
Step 3:
Time to get stabby.
Take your bottle cap and place it on a blade-protected surface. If you have a Stanley knife or cutting board, great! I do not, however. I used a small kitchen knife and a thick breadboard for this step.
First, get one of your lollipop sticks and place it flat on the bottle cap. With a marker or pen draw lines either side of the stick:

This is so you know how wide to make your incision.
Now, I’ll state the obvious: please be really careful. If you’re under 18, please ask an adult for help or supervision.
I very gently but firmly eased the tip of the knife into the bottle cap. Then taking the handle in both hands, I patiently wiggled the knife from side to side, making the incision longer. This didn’t take long at all, but for genuine safety, I also didn’t try to rush. Once I’d wiggled all I could, I took the knife out and moved it to another point between the two lines and repeated the process.
This should result in a thin cut between the two lines you marked onto the cap. Don’t worry if the cut is at an angle between the lines. So long as the cut is straight, that’s fine.


Now shove your lollipop into the incision. I bought my lollipops from Amazon. Cheap, good quality, and lots of them.

Step 4:
Time to get sticky.
Cut out your pictures leaving a small border of plain white paper. If you’ve printed each sheet twice, you’ll be able to make the mini double-sided. Only stick one copy of your character onto the cardboard for now.

Cut out the pictures, cropping off the white border. By including a border to start with it allows for a cleaner edge and means you’re less likely to lose some of the image trying to cut close to the lines, or equally leave a cardboard edge trying to avoid cutting too close.
Step 5:
Hold the cardboard against the lollipop stick. Get it centralised and make marks on the back of the cardboard. This is so that when you glue it on, you can stick it down right the first time.


Alright, now get glueing that cardboard. Don’t worry if you’re outside the lines with the glue. The lines are there to help you put it onto the lollipop stick with accuracy.

Step 6:
Now that you’ve glued your cardboard bits onto the lollipop stick, it’s time to make it double-sided. This couldn’t be easier. If you printed out two sheets, cut out the same picture again and glue it over the lollipop stick, onto the back of the cardboard.
Alternatively, you could write a tiny blurb about the character or monster and glue that onto the back of the mini instead. I went with double-sided so that everyone sitting at the table will be able to see the image.

Ta-da!
And there you have it! Once you’ve made one, you’ll be churning out these little babies like a homebrew factory. There are incredible artists who make paper minis on Patreon, but making minis this way means I can tailor the characters to look a lot more how I envisioned them. Even so, I’ll be sharing more about those Patreon creators in my next “D&D for Noobs (aka: me)” post as well as how I made the House Crests for my minis!
Do you make your own tabletop minis? Did you make any from my ‘tutorial’? Please share if you did! Find me on Twitter @WillSoWood with your ideas and images.

Leave a Reply